
Donor Photo Management
How to Add a Photo to a Donor Profile in Your CRM and Calltime App
Personalizing donor profiles with photos makes it easier to recognize and remember your contacts. Here’s a step-by-step guide to adding a photo to a donor’s profile from your CRM, ensuring it also shows up in the Calltime app.
Step 1: Find the donor profile you want to update in your CRM. Look for the circle with the donor’s initials next to their first and last name.
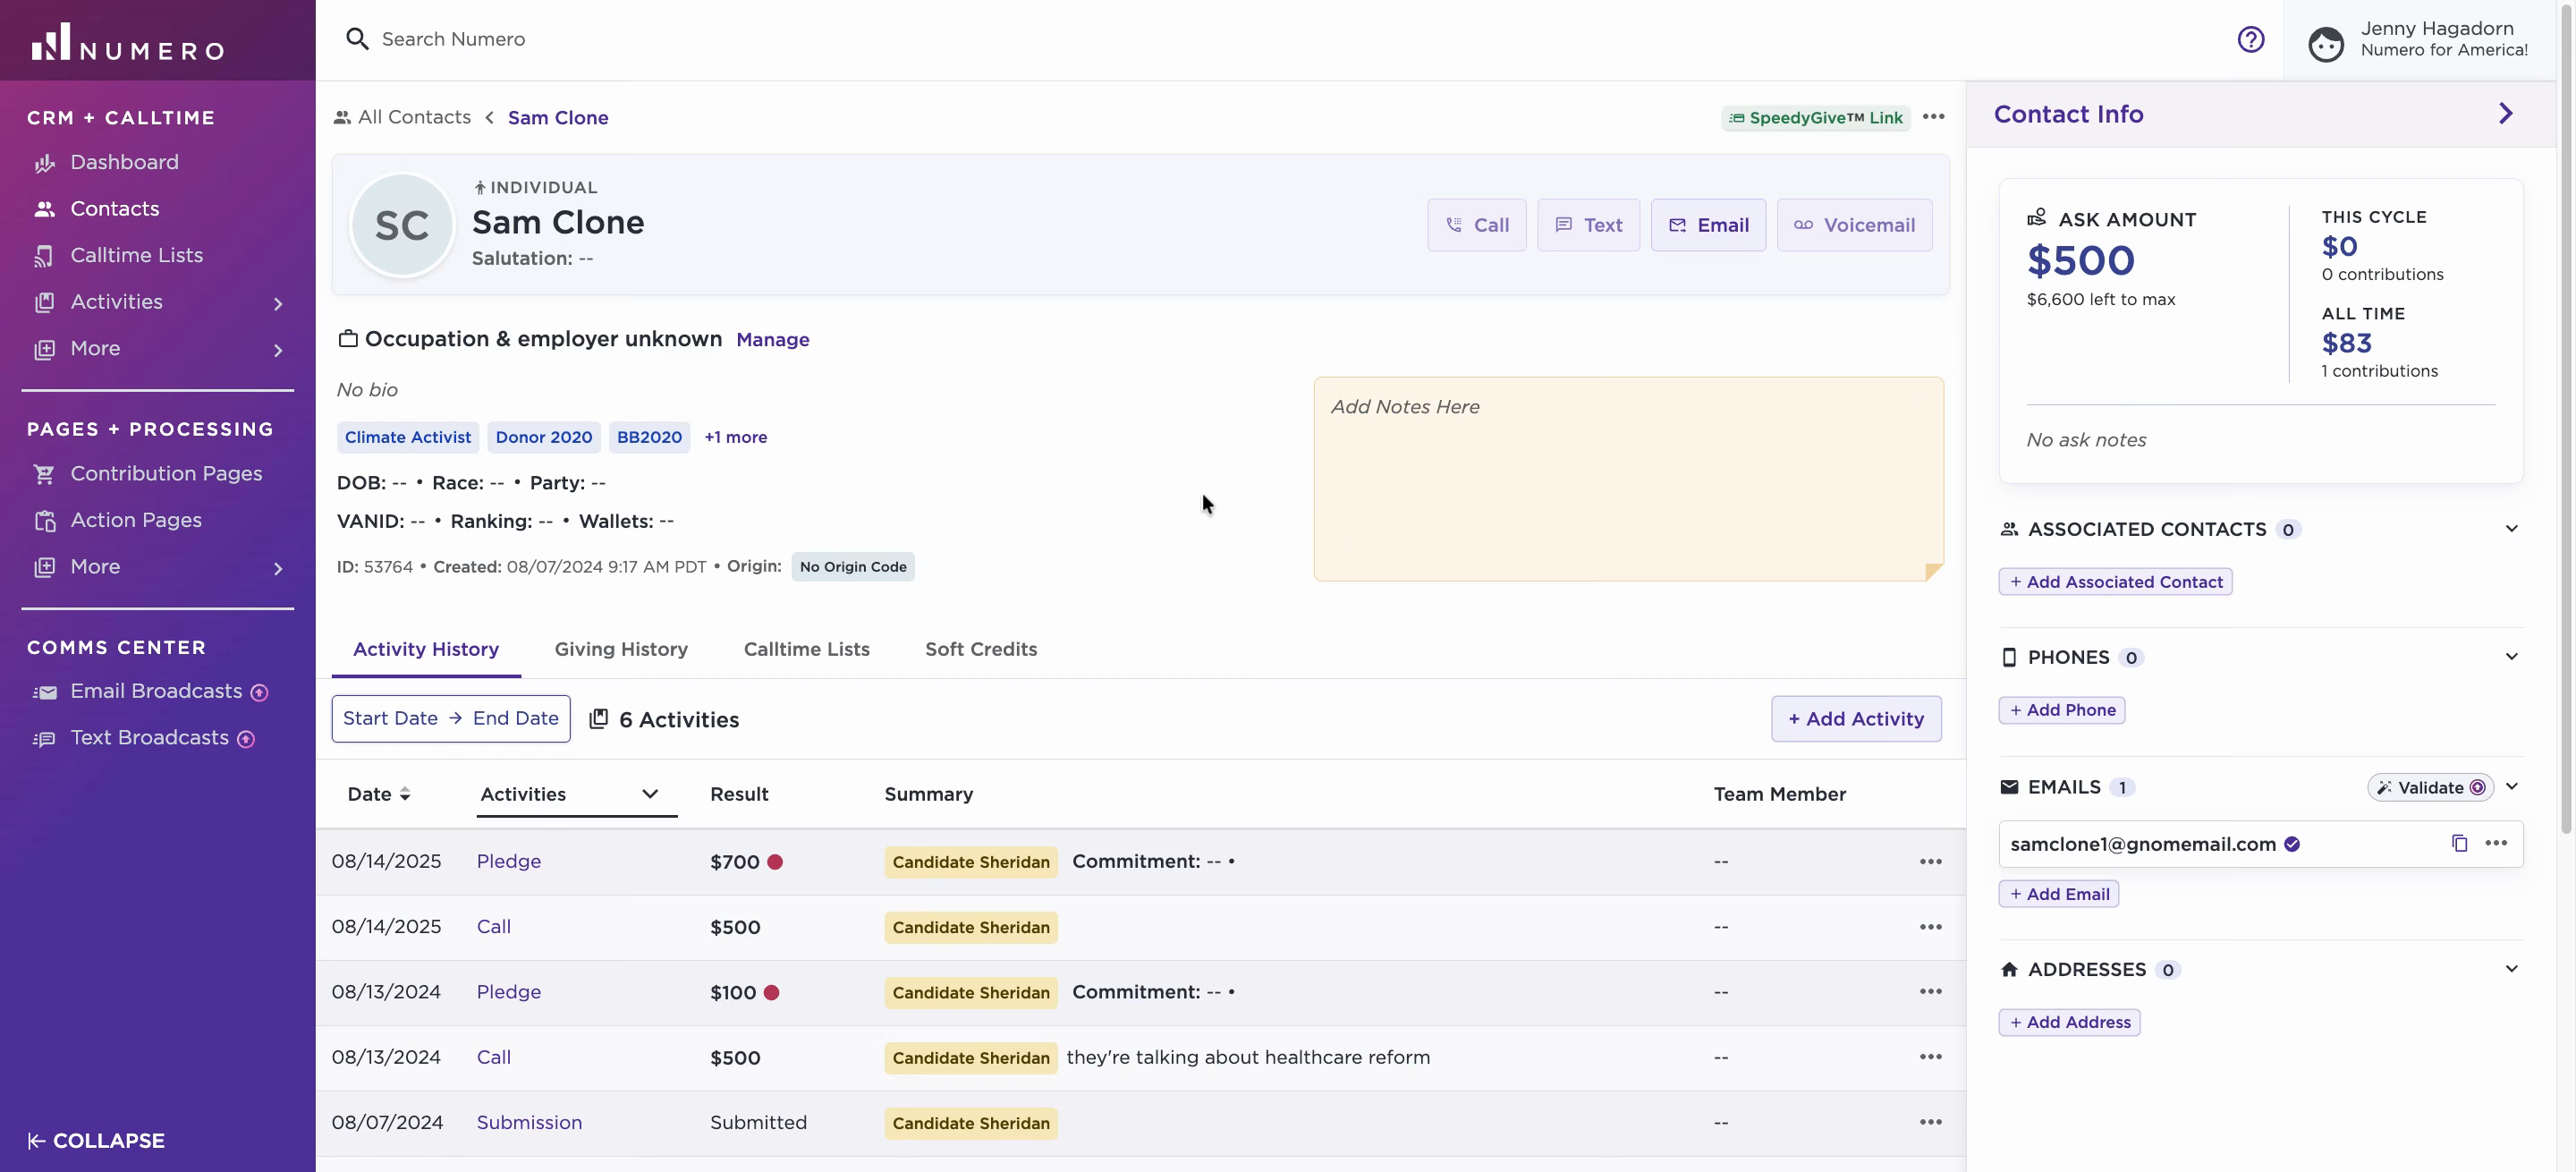
Step 2: Click the circle with initials to open the photo options. Select the add a photo option.
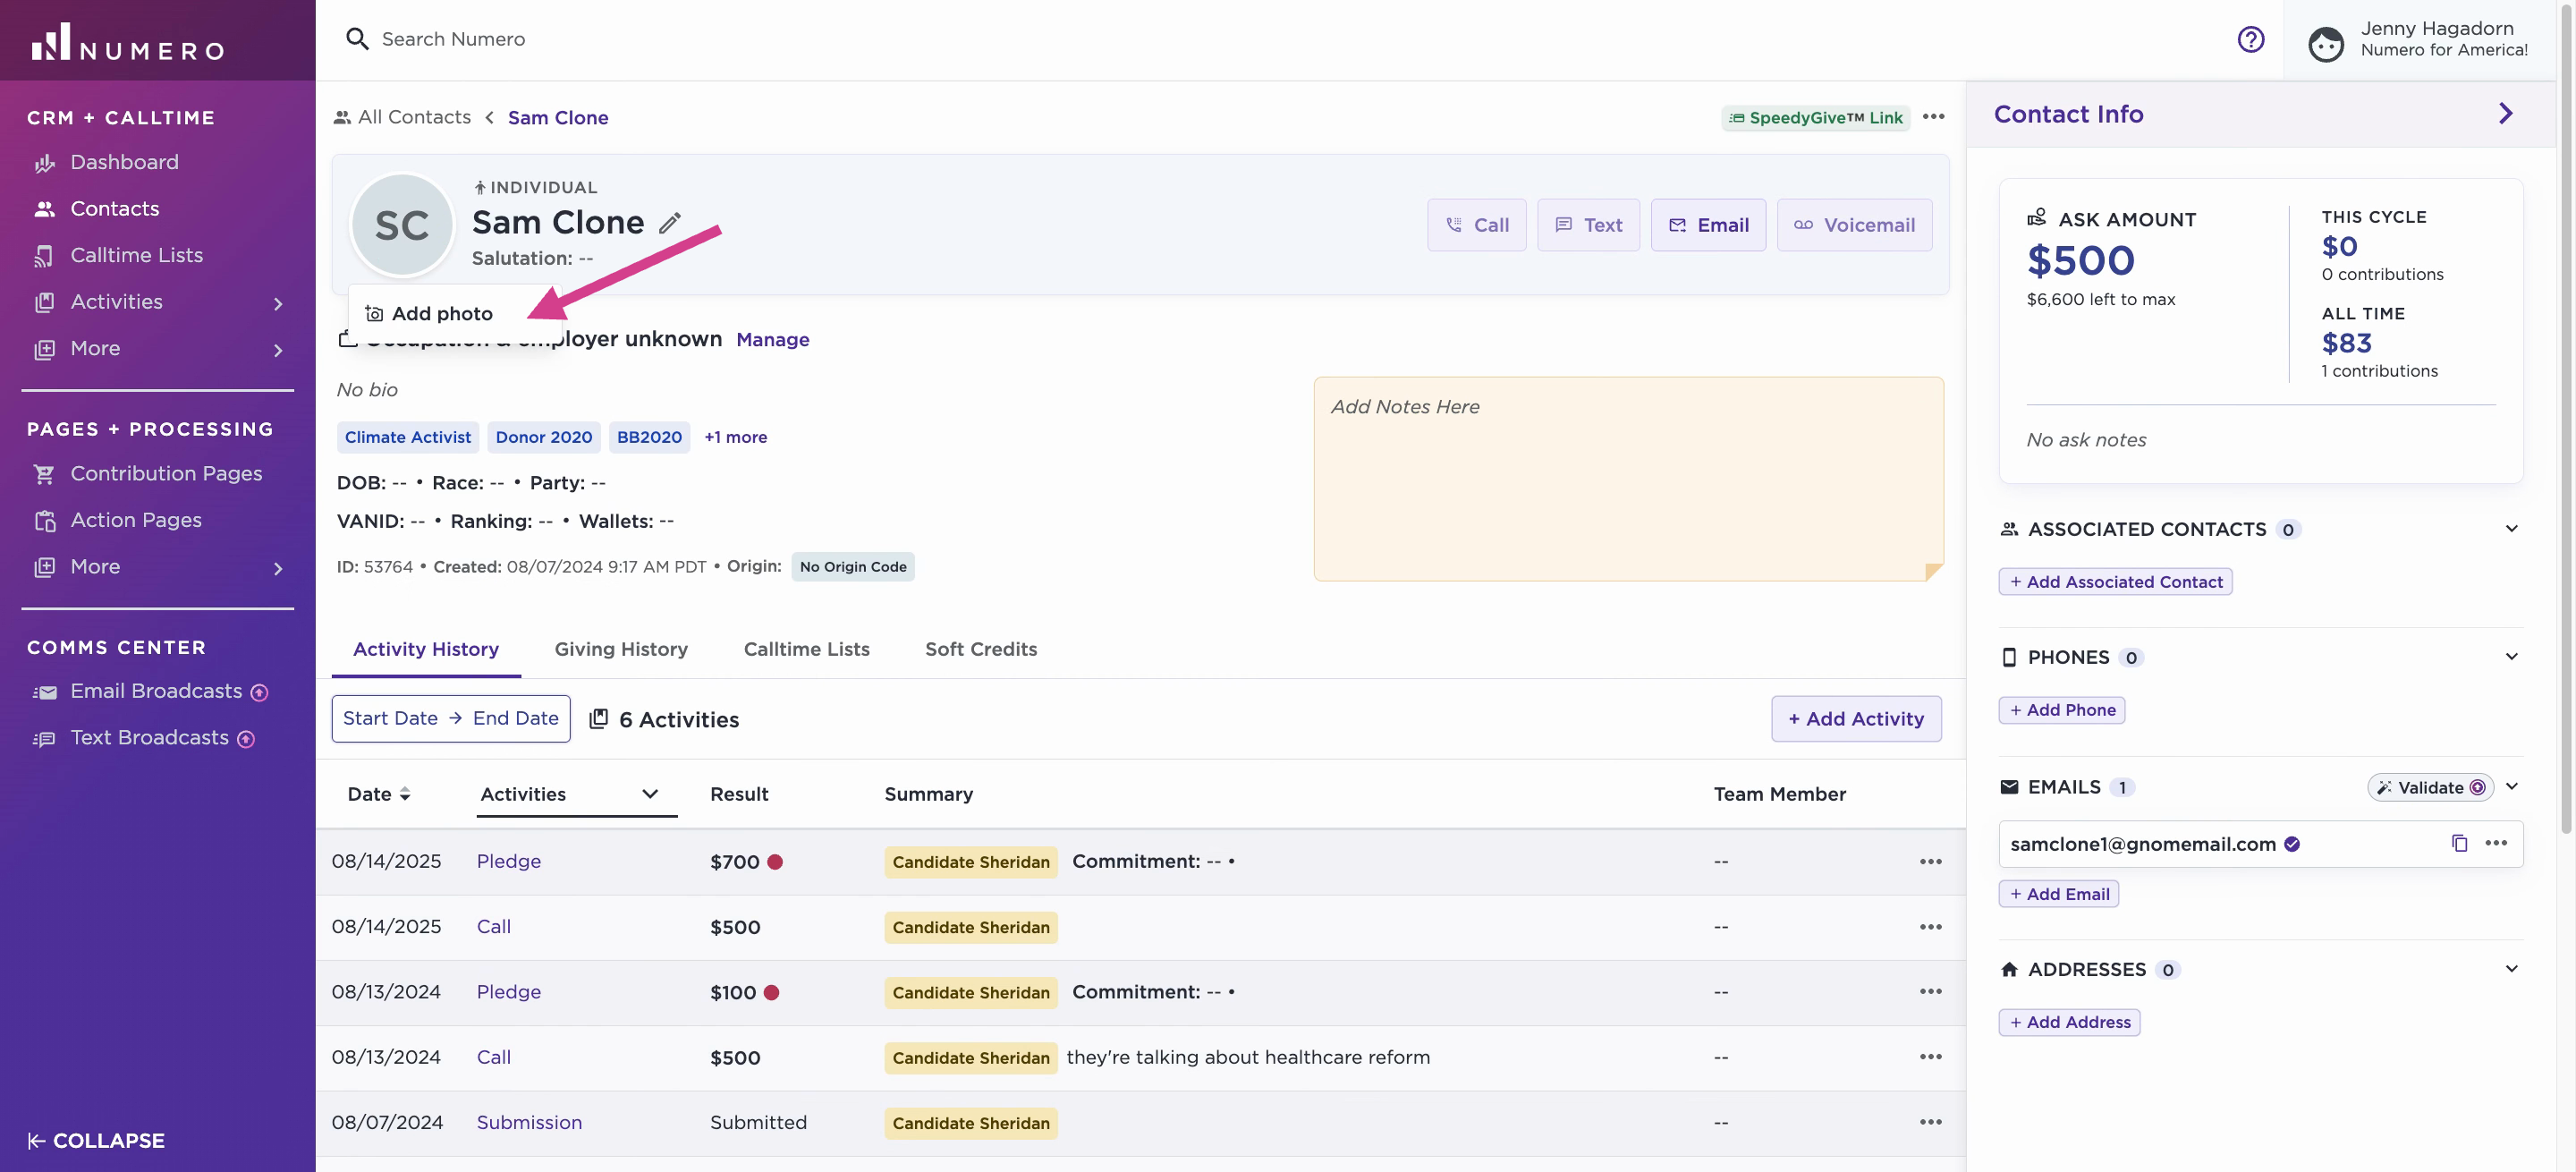
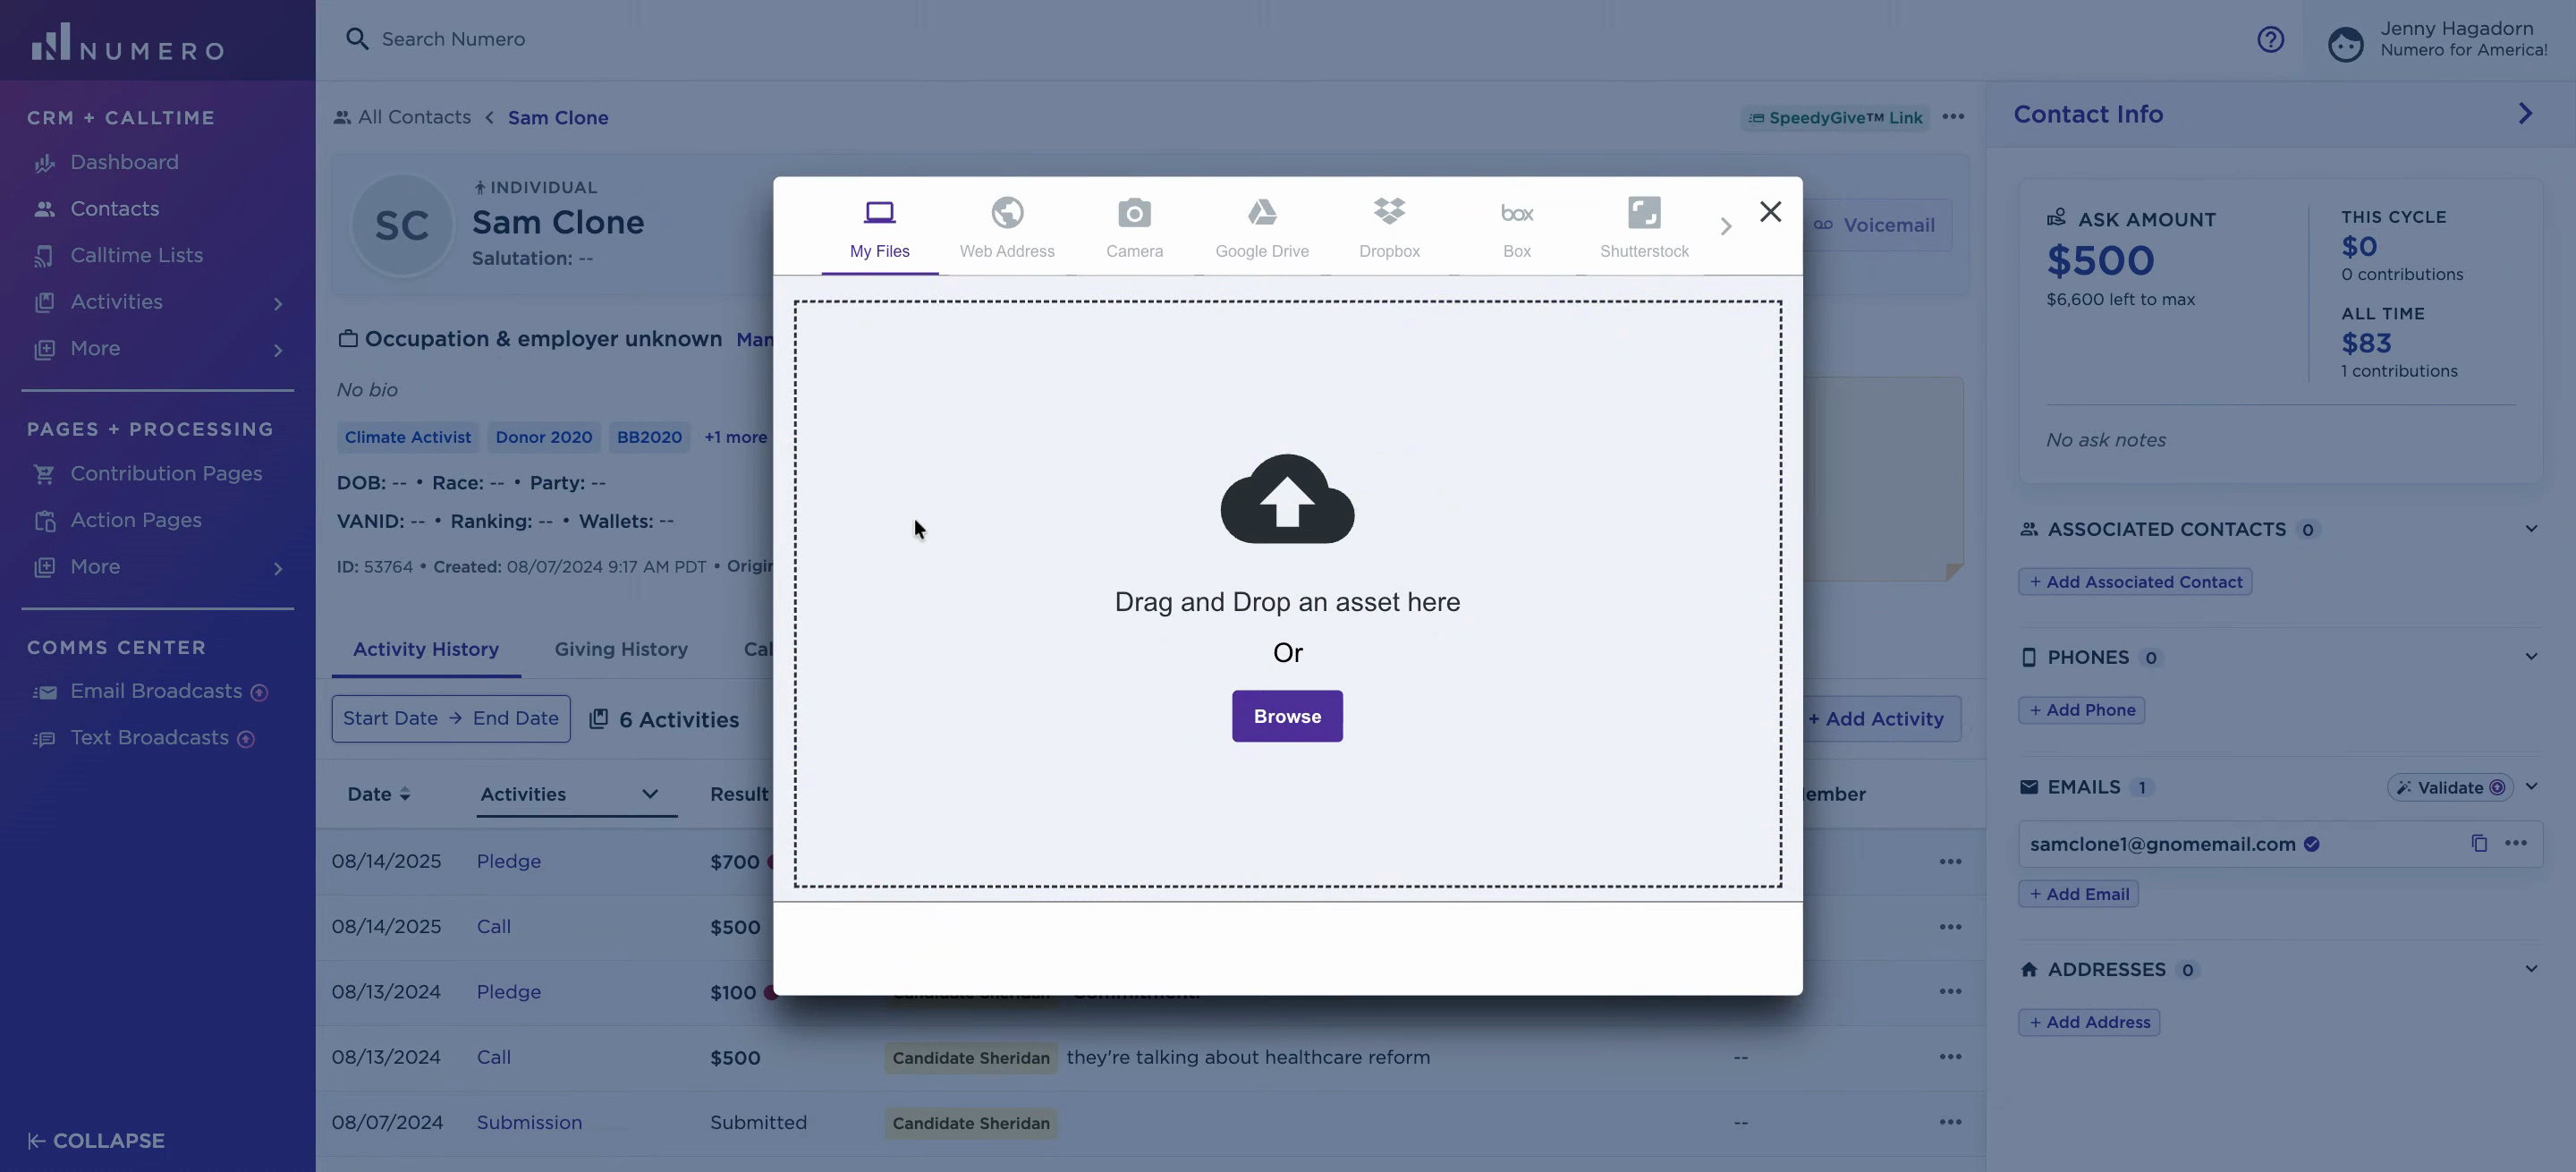
Step 3: Choose how you want to import the photo.
-
For photos on your computer, select the My Files option, then click Browse. Locate and upload the photo from your computer.
-
For photos on the web, choose the Web Address option. The URL must be public—private Facebook or Instagram links won’t work, but public images like from LinkedIn are good.
On the image’s page, right-click the photo and choose Copy Image Address. Don’t select Copy Link Address. Paste the copied URL into the public URL field and proceed by pressing the arrow.
Use the crop tool to focus on the desired part of the photo, such as the face, then hit Crop.
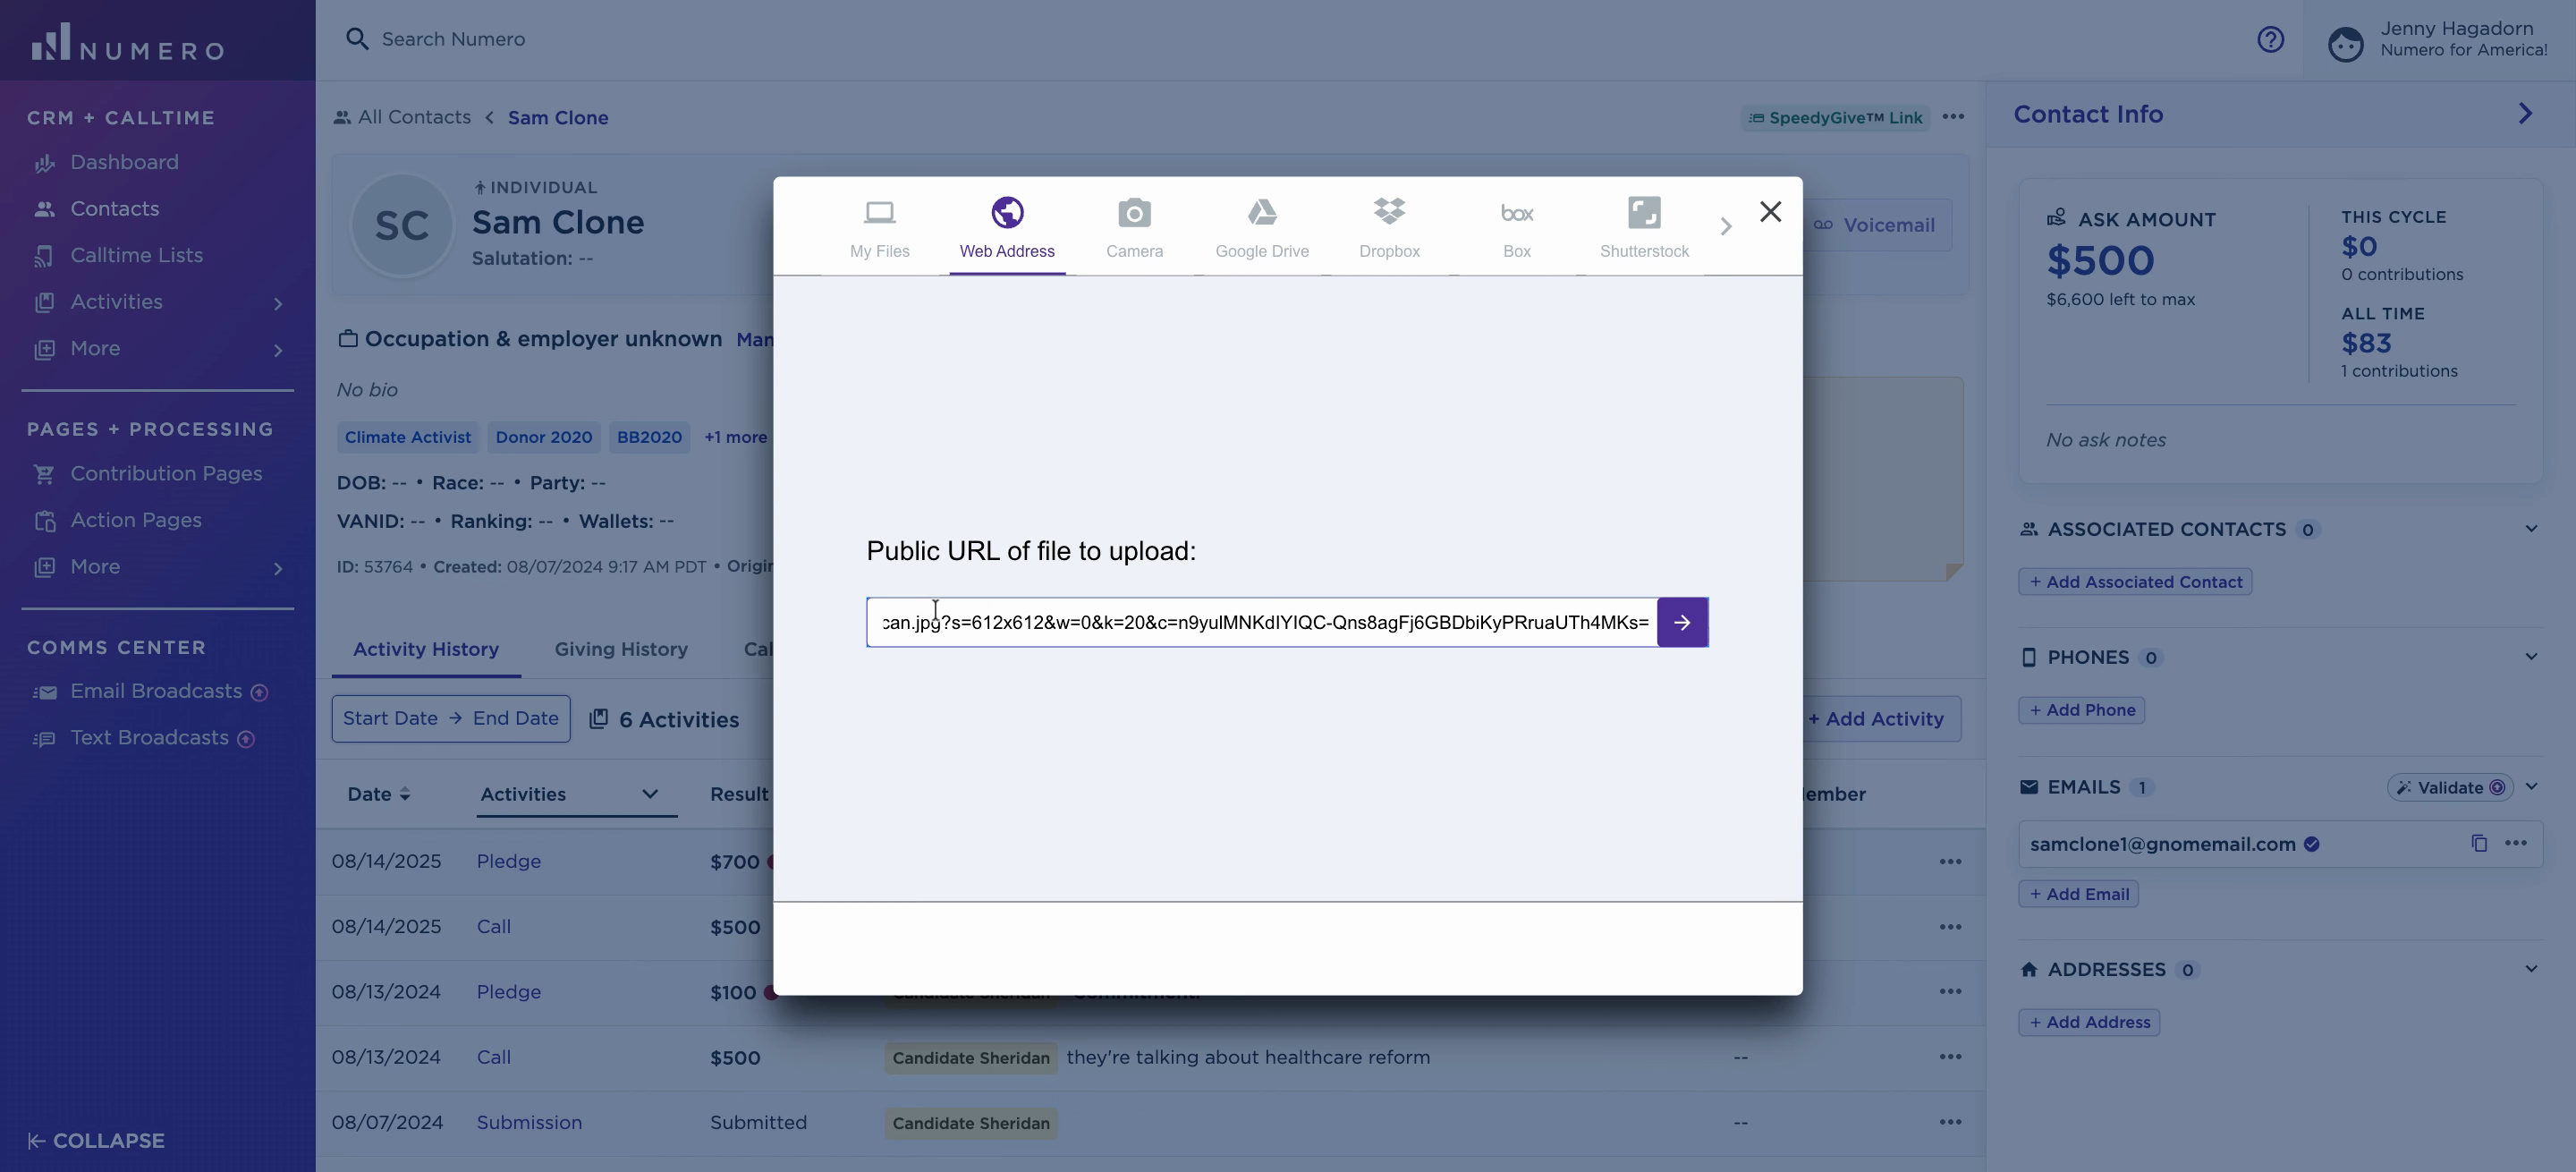
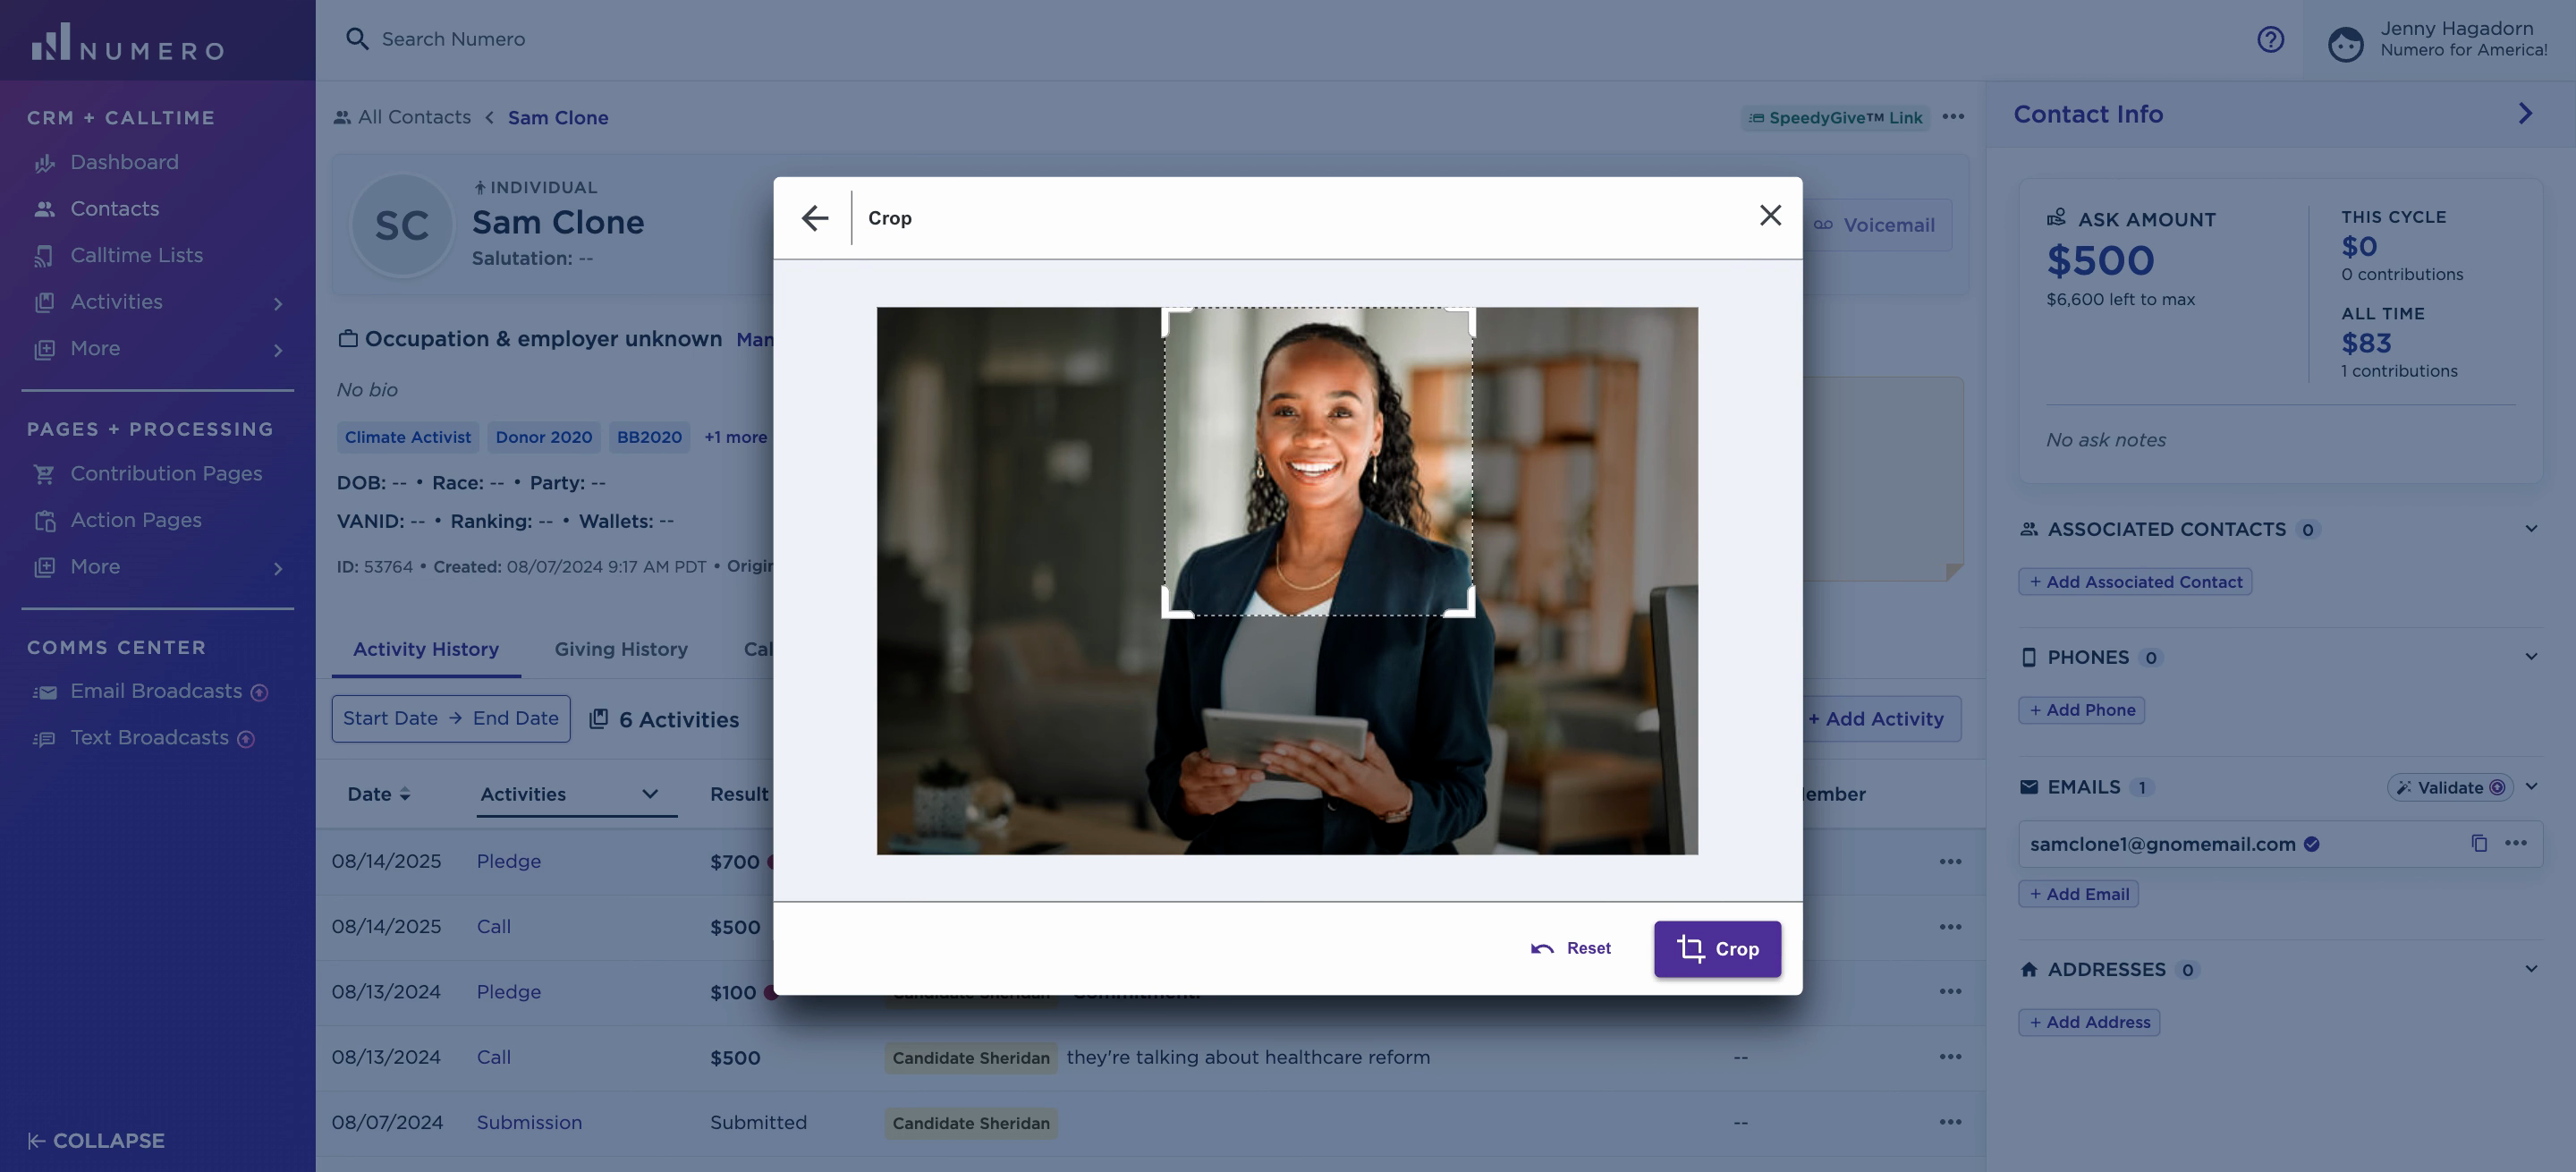
Step 4: Click Done to save the photo. The profile now displays the new photo for your donor. The photo appears in the Calltime app as well.
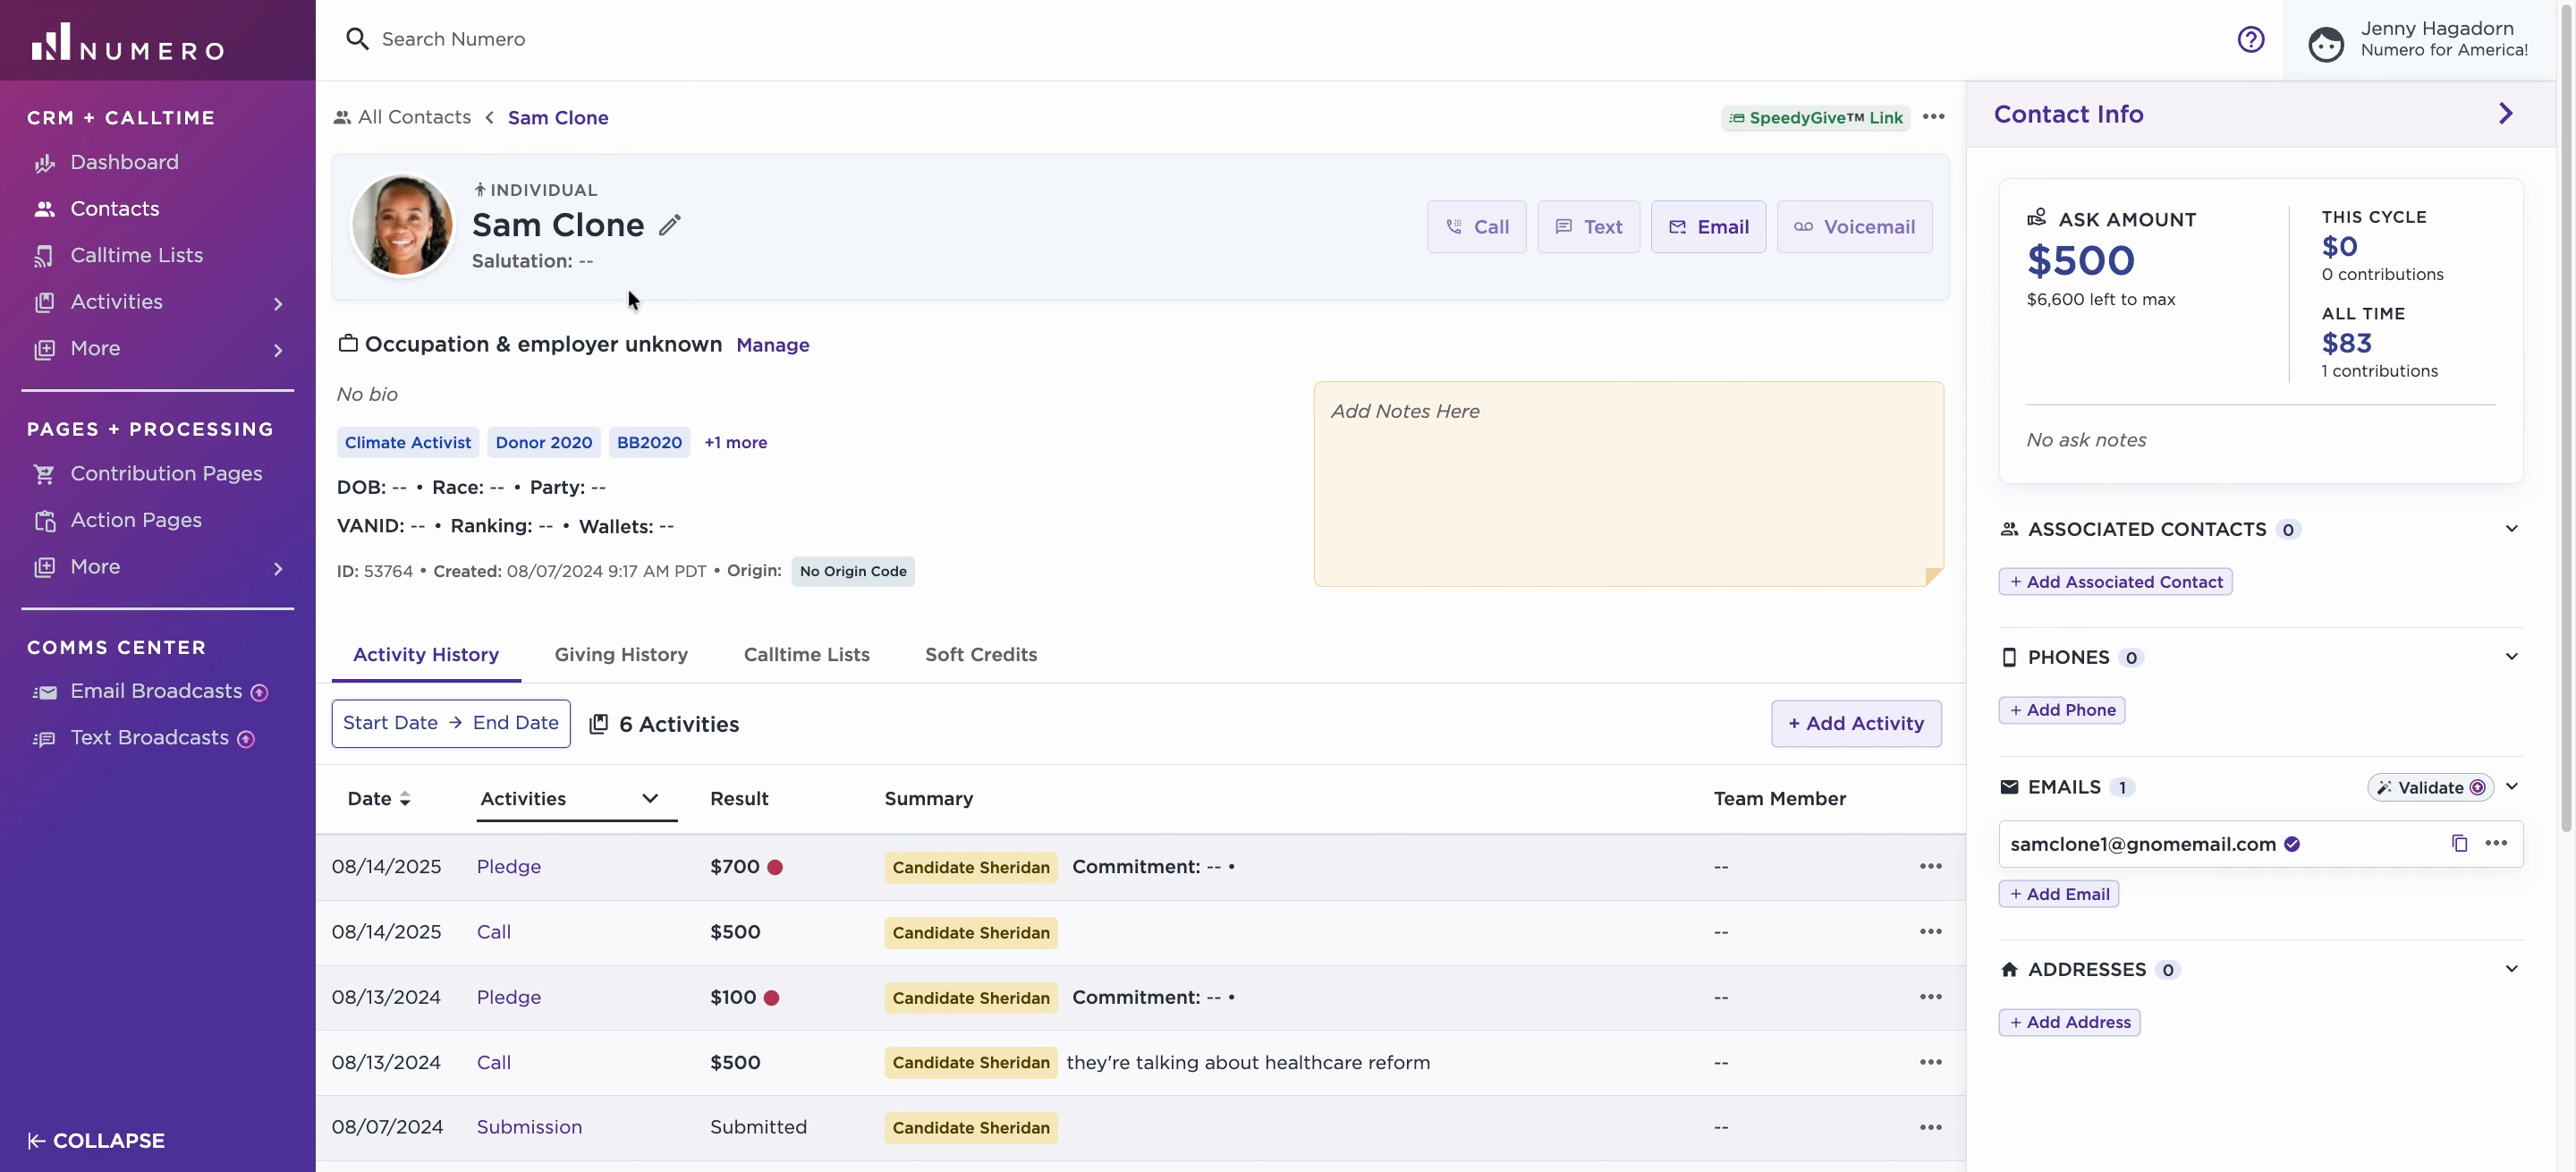
Adding photos to donor profiles gives your CRM a more personal feel and helps your team quickly identify contacts across platforms.