
Saved Export Template
If you use the Custom export template option frequently with the same options selected, we recommend you use the saved export template feature the next time you process an export. That way, when you export moving forward, you can select the saved template, instead of spending time selecting each custom field.
Step 1: Filter for your Contacts, Interactions, Contributions, Pledges, Submissions, or RSVPs, and select Export.
Note: Saved templates must be created within each individual tab mentioned above. Meaning a saved template in Contacts will not appear as an option when exporting from contributions, for example
 Step 2: Choose Custom export type in the Data to export field and select your fields.
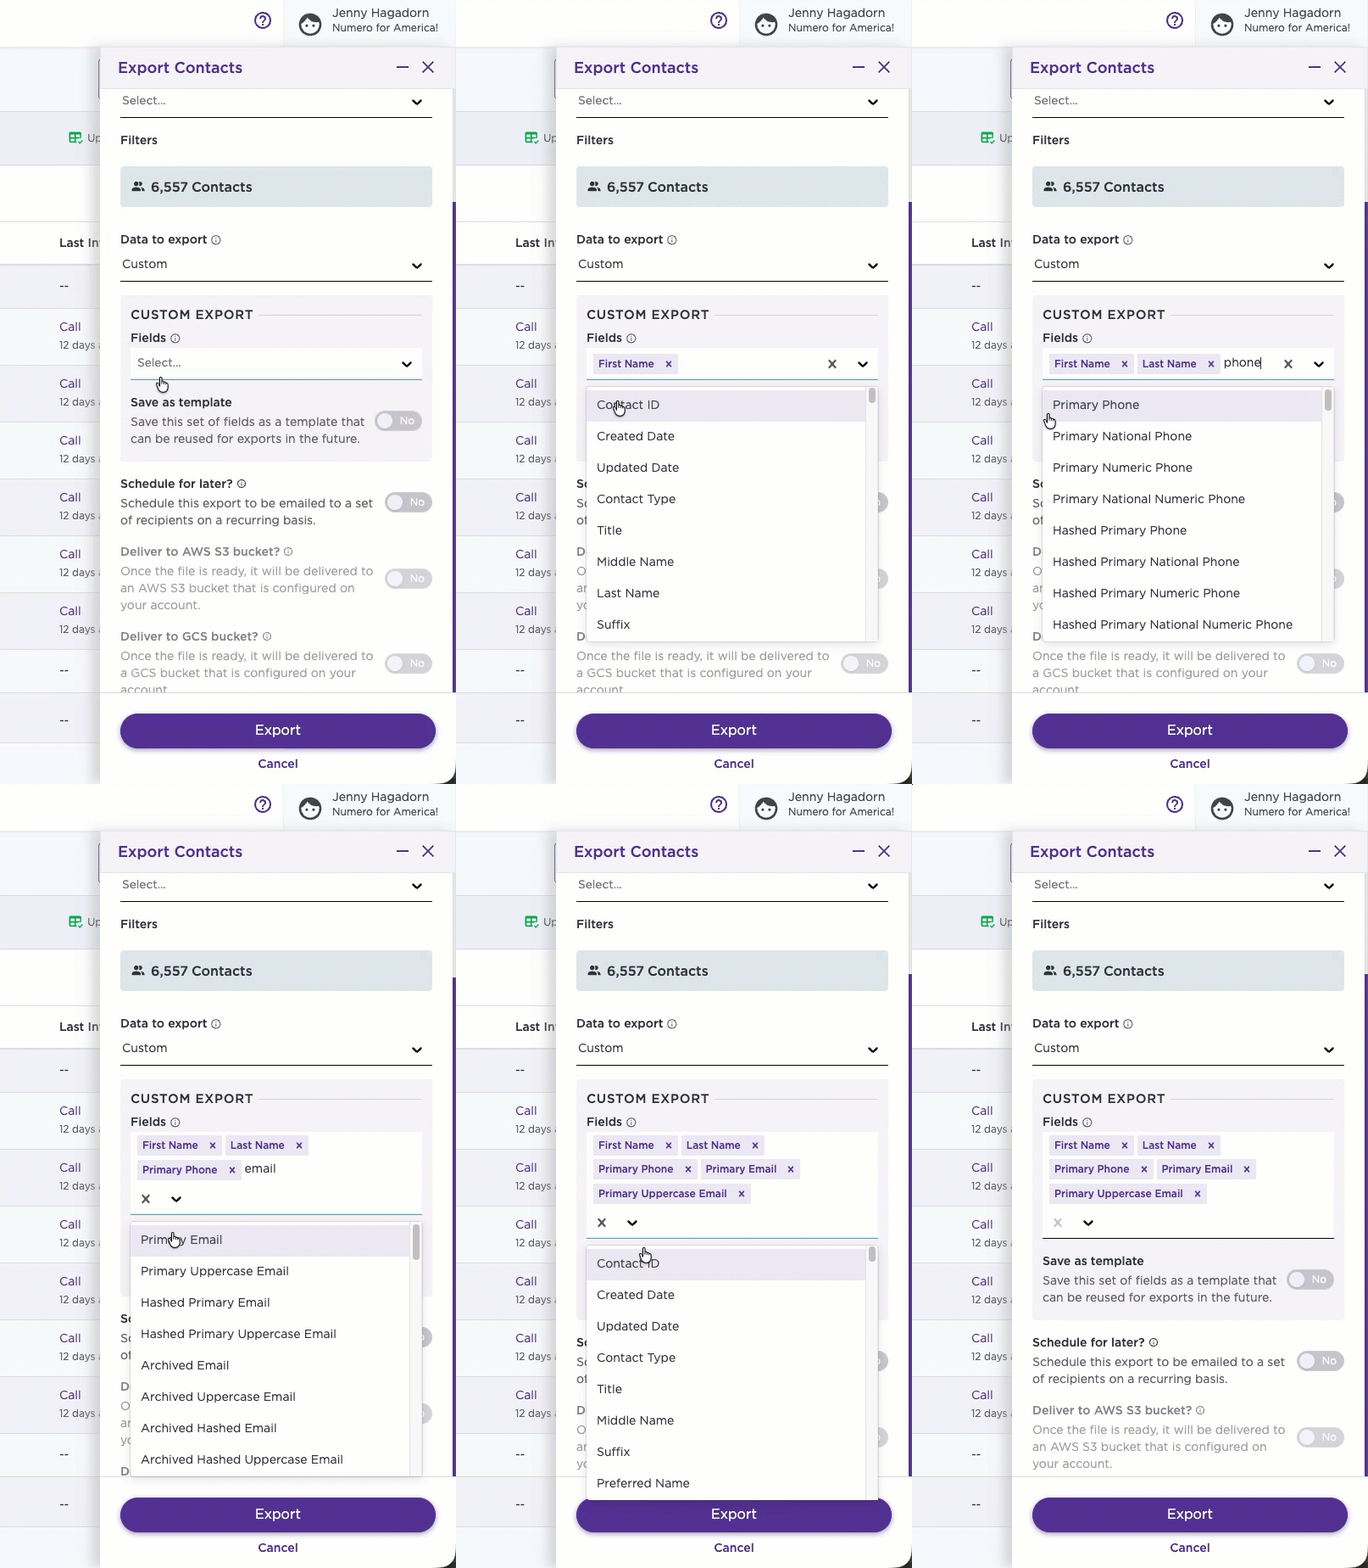
Step 3: Toggle Save as template to Yes. Create a Template Name and who to share it with (Private or Team). Select Export.
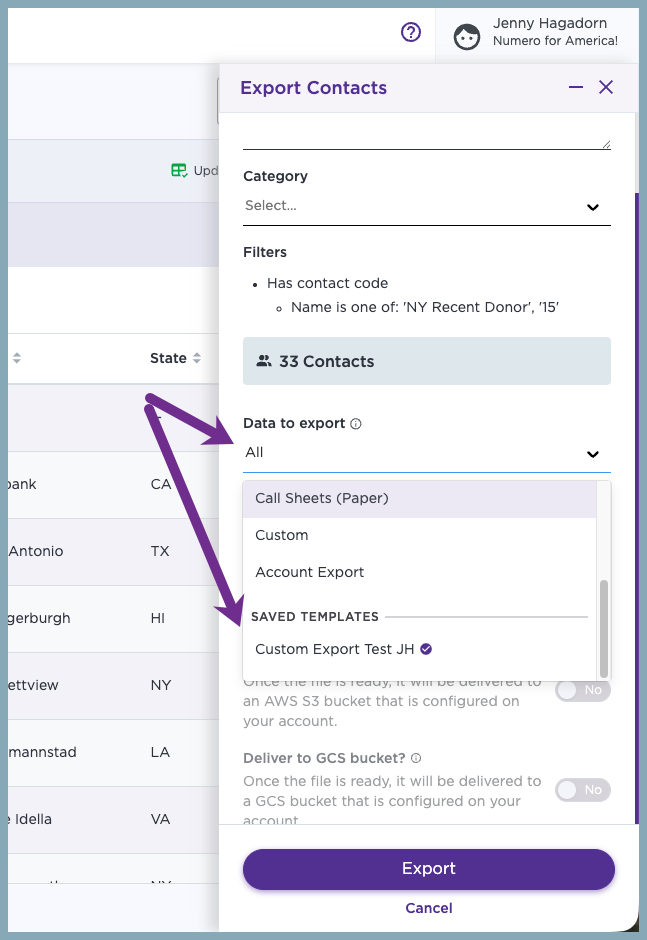
Now when you go to export from the Contacts tab, for example, you'll see the option of the Saved template previously created.
What else to know!
- Templates are available for every export type. Whether you're exporting contributions, interactions, or another data type, you can create and save templates for each.
- Adding a field to a saved template doesn't update the template. If you select a saved template and then add an extra field for that export, that field only applies to the export you're currently running - it won't be added to the saved template itself.
- To update a template, save it again. If you want a new field to become a permanent part of the template going forward, you'll need to save it as a template again after making your changes.