
Import Contacts
To bulk import, a list of contacts, whether, from an existing spreadsheet you have or by using our contact import template, follow the below steps. But before you go through the import steps, it's really important your file is in tip-top Numero import shape:
- Tip #1: Column Headers - If you work off of an existing spreadsheet, we recommend you change your original column headers to match what is in our contact import template- certain column headers are required (ex: First Name & Last Name for individuals, First Name & Contact Type for organizations) and others can be remapped to different properties depending on your objective
- Tip #2: Contact Type column - Include a column titled Contact Type with each contact in the sheet or template either being labeled as an individual or organization. If you're importing an individual contact, label them as an individual. Individual contacts must have a First Name and Last Name to import successfully. If you're importing organization contacts, they must be labeled with a Contact Type of organization and the organization name needs to be included in the First Name column
- Tip #3: Matching Properties - Super important to include matching properties in all bulk imports you complete within your platform because it will: a) help create complete profiles, b) help any new information to be appended to potentially already existing contact profiles within the platform, c) help prevent duplicates as much as possible. Matching properties are First Name, Last Name, Suffix, Primary Address, Primary Email, Primary Phone, Employer, and Occupation.
- For individuals, our system will look for a First Name, Last Name, plus additional matching properties. So if you only have a First Name and Last Name, we would recommend not importing that contact until you have additional matching properties to include. Same for organizations, if you only have a First Name (organization name), we would recommend not importing that contact until you have additional matching properties to include
- Tip #4: Contact Codes - You can include a column header titled Contact Codes if you would like to label contacts or tag them with a specific interest or quality. Keep in mind you can also one-off add a Contact Code to profiles or bulk apply them both within the CRM. Learn more about Contact Codes here
- Tip #5: External IDs - You can store external IDs like VANIDs within your Numero profiles. But if you don't plan on exporting from Numero and importing into another database, we recommend not importing them with any Numero import at all. The VANID property which is optional property is a super-matching property. This means the VANID will match first instead of the First Name, Last Name, etc. So if your other database has Jane Doe listed 5x times with all different VANIDs, upon bulk import into Numero, Jane Doe will have 5x profiles created, because those external IDs are all different. If you do plan on exporting from Numero and importing into another database, we ask that you clean up your file immensely prior to importing it into your Numero platform.
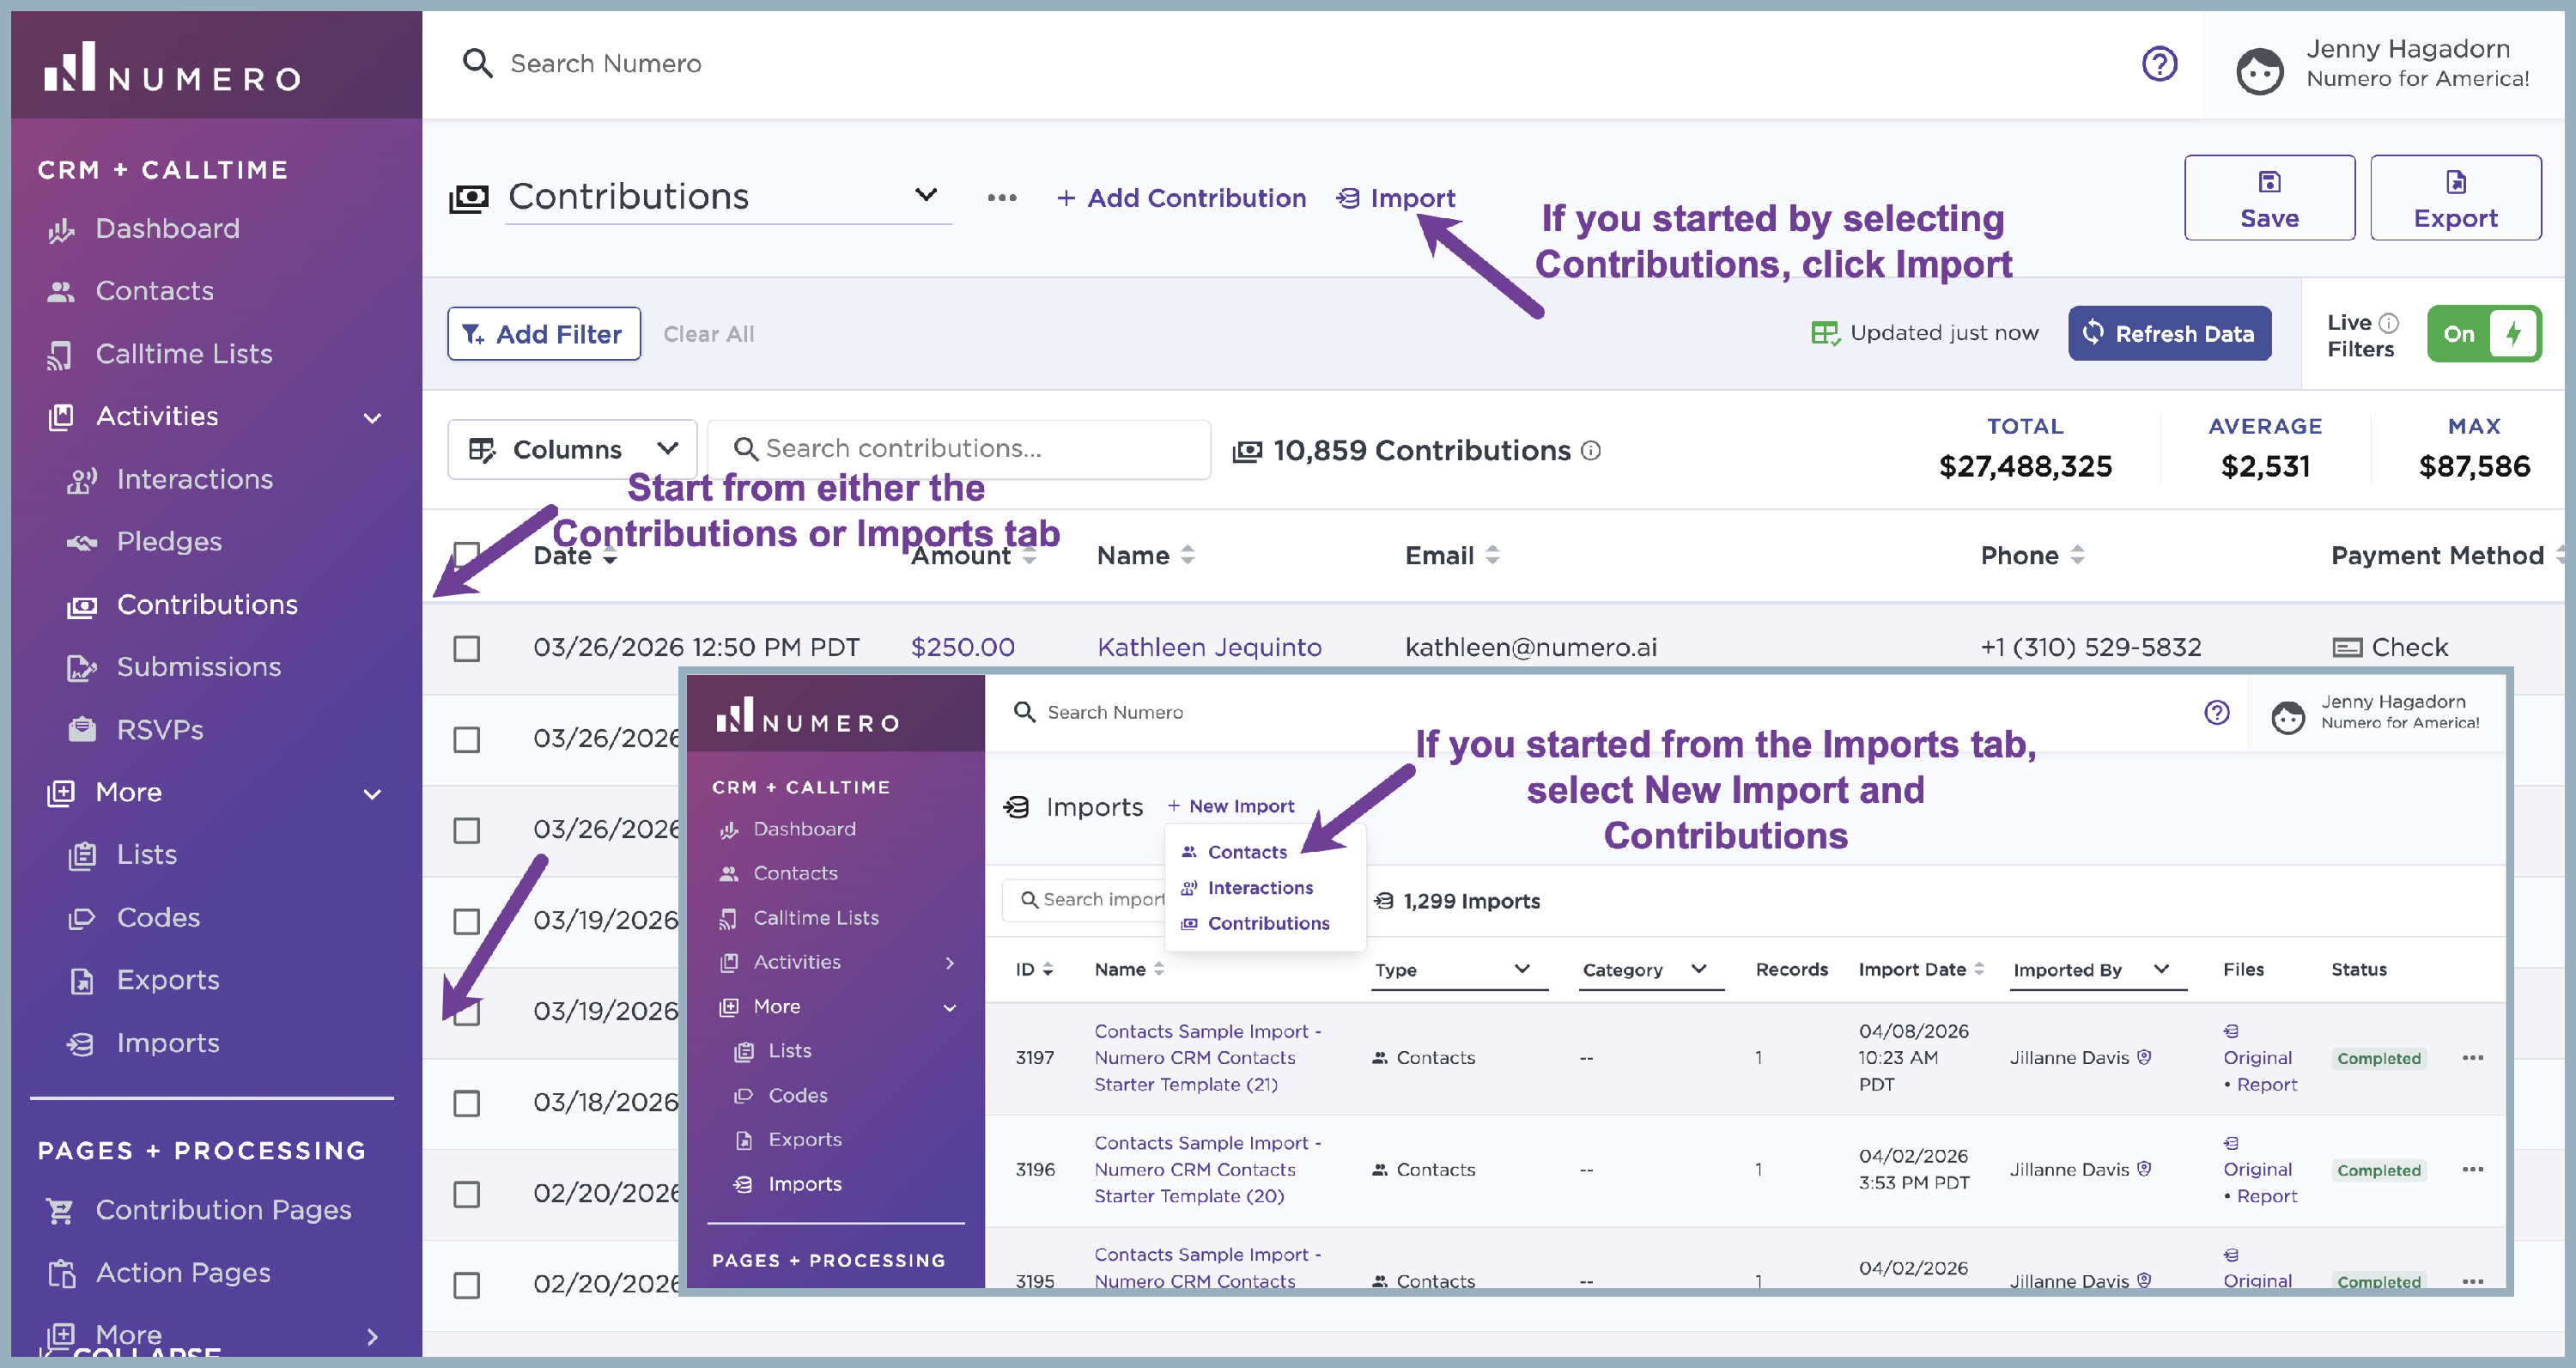
Once your file is ready for import, save the file as a .csv then within your platform select either the Contacts tab or Imports tab both located on the left side of the platform.
- If you were to select the Contacts tab, you would then select the Import icon on the top middle of the table. Once selected you'll be able to drop your file into the uploader
- If you were to select the Imports tab, when you select the New Import option on the top middle of the table and Contacts from the dropdown, you'll be taken to that same uploader to drop your file into

After you drop the file into the uploader you'll be taken to the mapping process where you'll need to check that the column headers on the left are mapping to the correct Numero property on the right. You can exclude information by selecting the Exclude option on the far right side. If at any time you see a red warning symbol next to the Numero property, it is basically telling you that the system isn't sure what the original column header means on the left side. So from the Numero property dropdown select where you want that information to live within a contact profile. Select Next when you're ready to complete the contact import
 Before completing your import, you can choose to update the: Name, Description, Category, and you can choose to add an Origin Code to every contact from this file. Choose the Report Format - Counts Only will show you the count of contacts (example: one row with the count of 400) that were not successfully imported and Detailed will show you which exact contributions (example: potentially 400 rows with the exact 400 contacts) were not successfully imported. The report will also display deduped records. Note: The Detailed report is only available for imports with less than 25,000 records.
Only use the "Use VANID Exclusive Matching" if you are importing a VANID or different external ID in the VANID field and want to use that as the exclusive matching property and not rely on our other matching fields for merging / deduplication.
You can also choose specific Data Merge Rules in the advanced settings tab. Read more about the Data Merge Rules here.
Next, select the box at the bottom which notes that you understand that imports are irreversible. If at any time you import a file and you need assistance deleting that file, email us at support@numero.ai. Each case is different so we ask that you include some detail like the file name so we can help advise the next best steps on how to get that data out of your system. Once your file has been imported, you can see what contacts potentially didn't import into the system by looking at the number of results compared to the rows count. If we imported a list with a rows count of 100 contacts and it resulted in 80 contacts, there are potentially 20 contacts that did not get into the platform so you can download the exceptions report located at the Download Report link to see which contacts were not successfully imported.

The most common reasons that a contact was not successfully imported are that:
- An individual contact was missing a First Name or Last Name, both names are required for import
- An organization was not labeled with a Contact Type of organization, which is required since your organizations do not have a Last Name

If you have any questions about bulk importing, please let us know at support@numero.ai