Create an RSVP Page
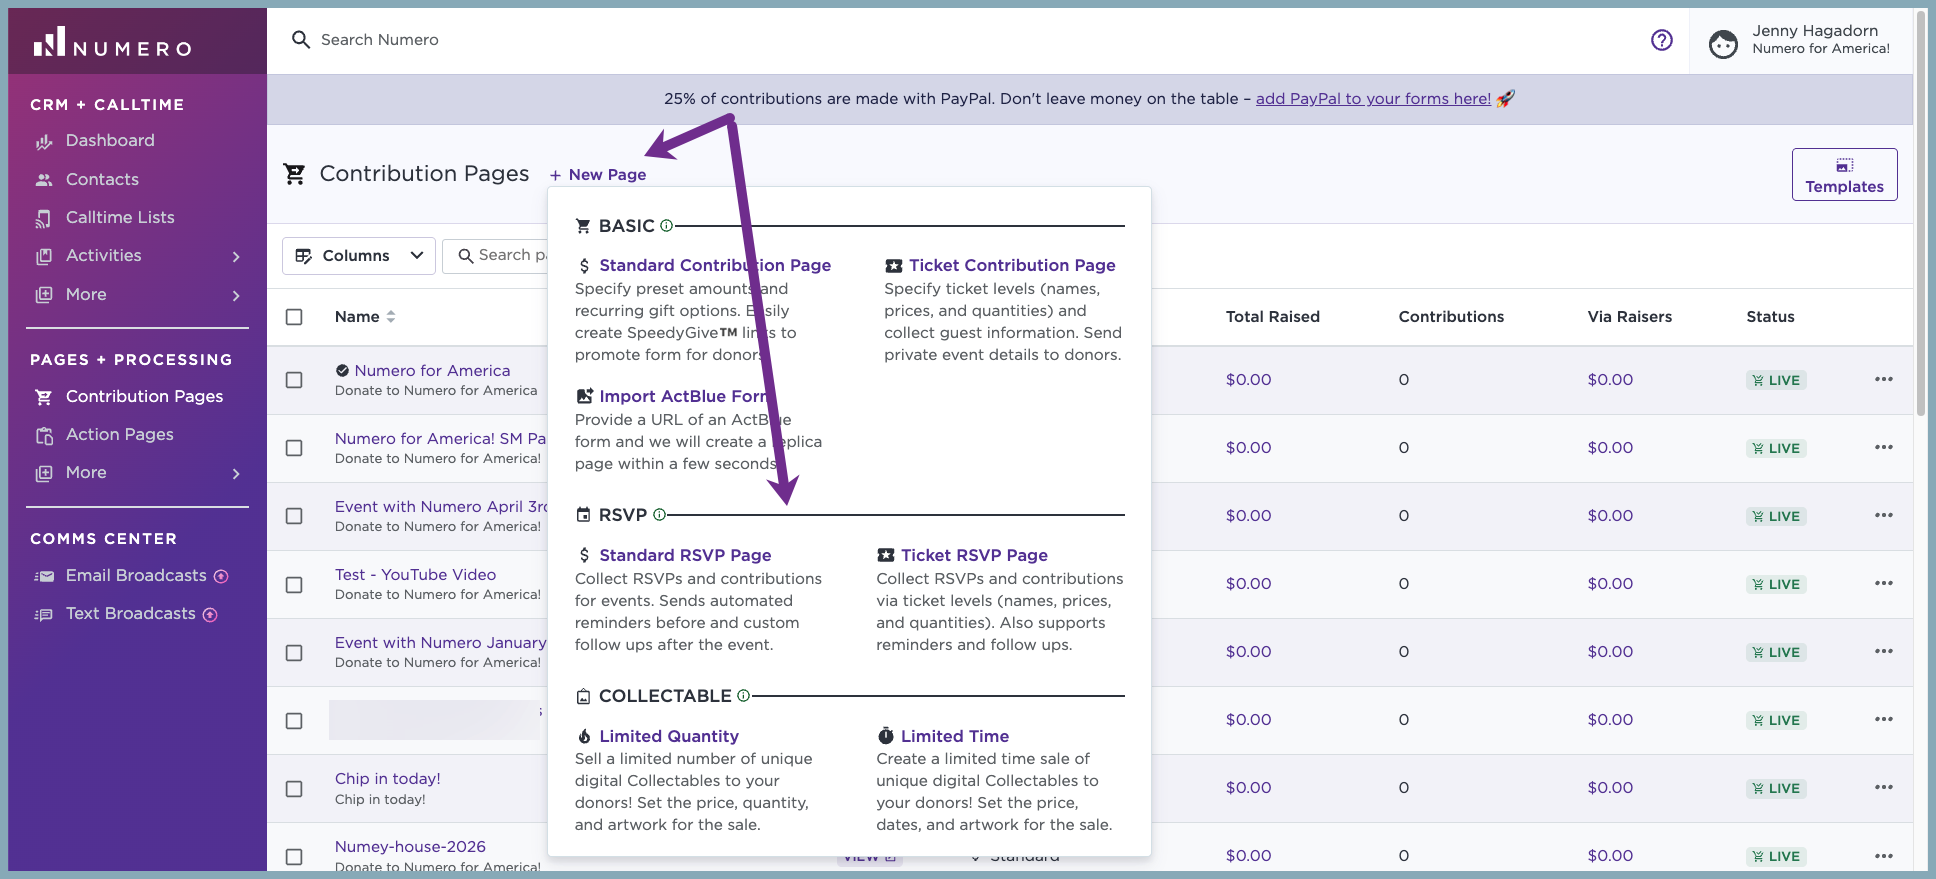
1. From the forms tab, select + New Page, select either the Standard or Ticket RSVP Page options (see form descriptions below).
- Standard RSVP Page: use this page for non-ticketed events in which you wish to utilize our RSVP tracking and automated reminder email features
- Ticket RSVP Page: use this form for ticketed events in which you wish to utilize our RSVP tracking and automated reminder email features
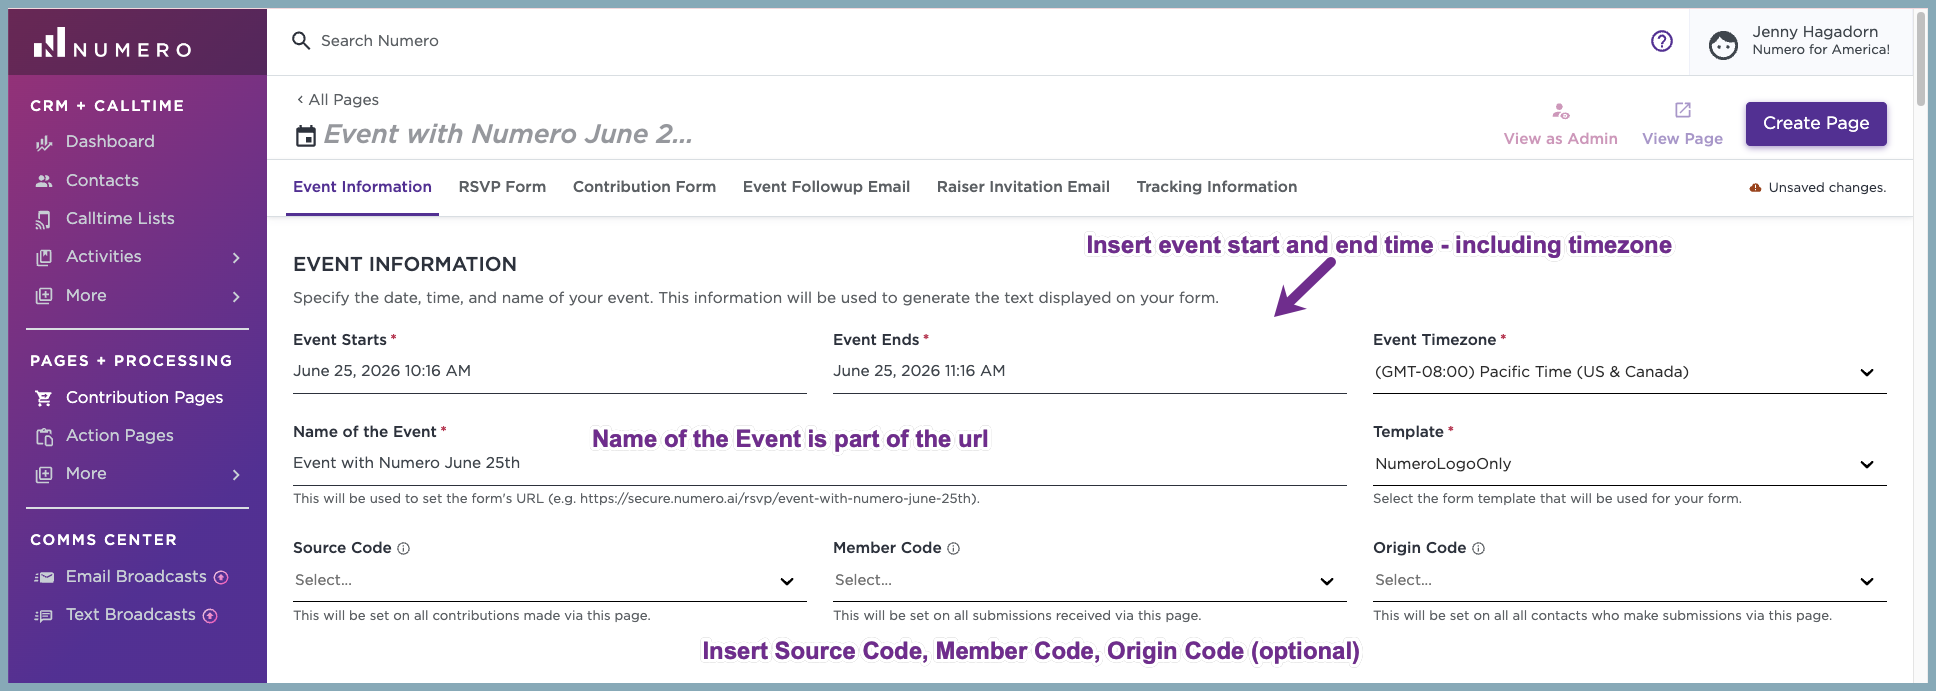
2. Add your event start time and end time. Name your event and remember that the name will be used in the URL. You can also input a source code, member code, origin code if you use them. Select one from the drop down or create a new one by typing in the new name. If you have a different template to use, select from the dropdown in that field.
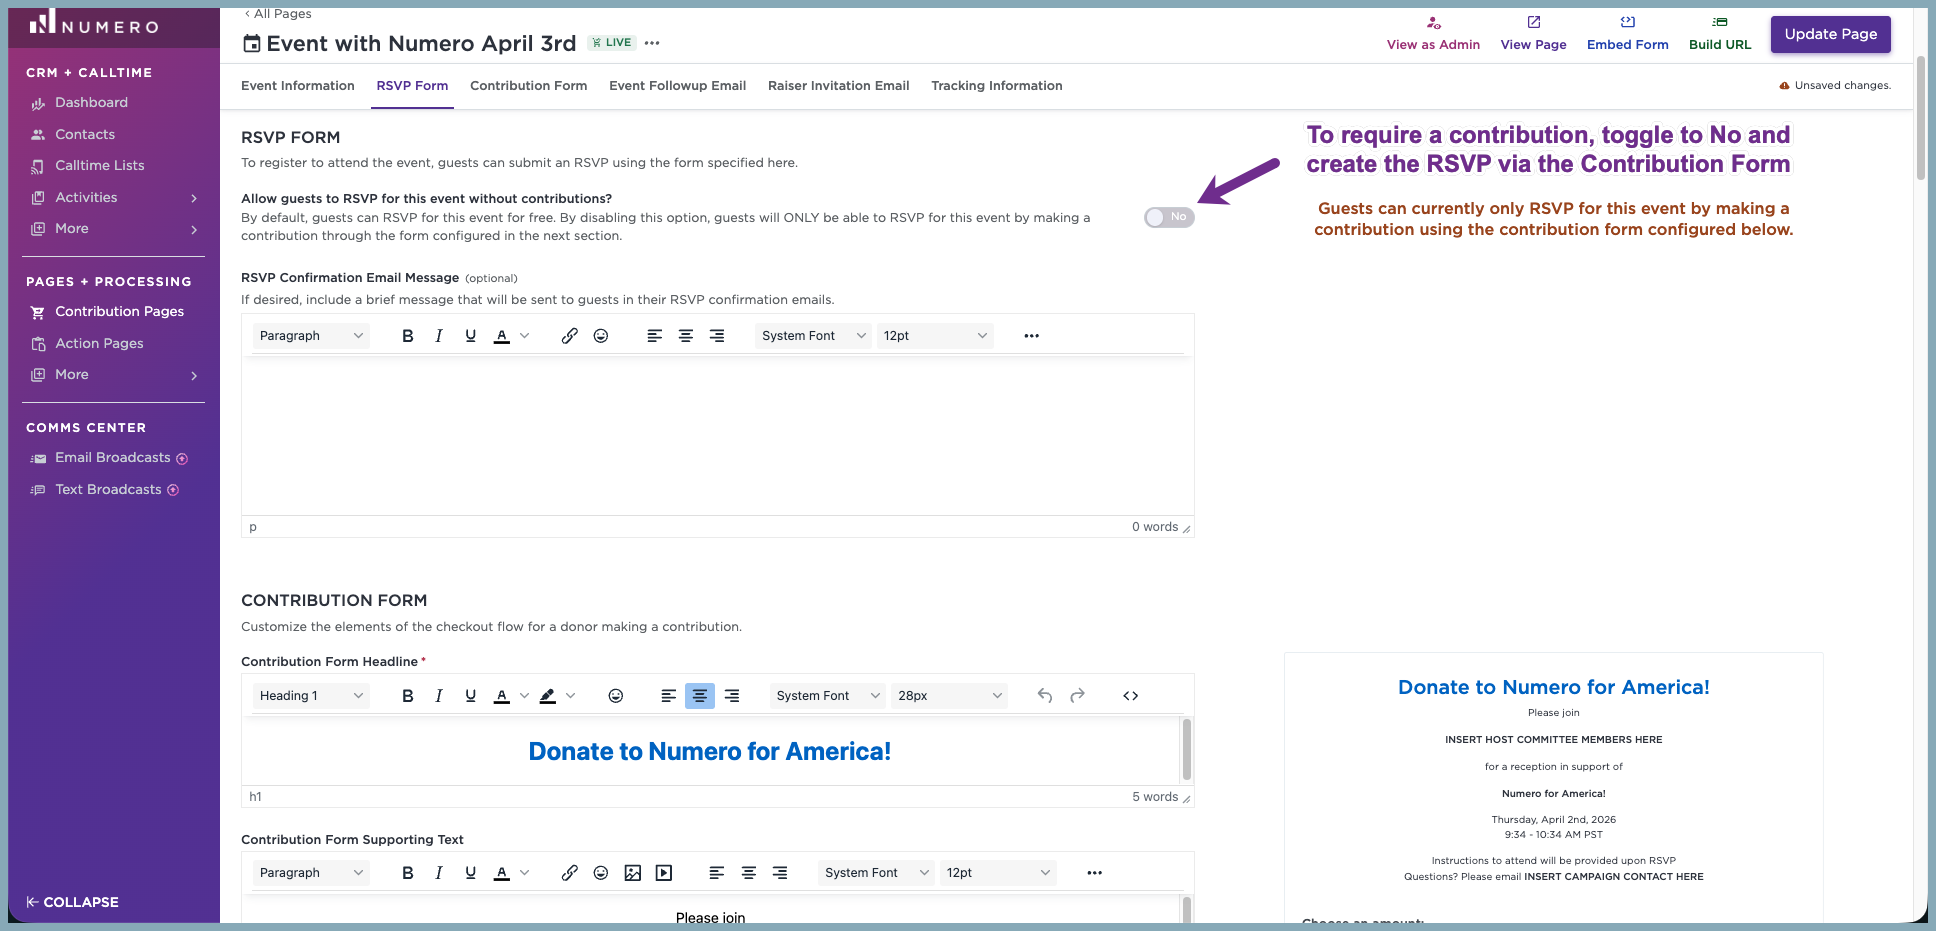
3. You have the option to make it mandatory for donors to contribute in order to RSVP or you can have them RSVP with an optional upfront contribution. If you want to require a contribution upfront, toggle the "Allow guests to RSVP for this event without contributions" toggle to No and bypass your RSVP form. For this option when donors contribute through the contribution form they will automatically be RSVPd for the event. Edit your headline and supporting text and be sure to insert the committee members and campaign contact. We'll show a preview of your form on the right hand side.
RSVP Form Editor (no contributions required upfront):
Bypass RSVP Form (for the mandatory contribution upfront):
4. Next fill out the RSVP Confirmation Email Message. If you plan to send your full event details (ex: Zoom links for virtual events or location) you can place those details in this box when you make the form. The donor will receive those details in their reminder email.
If you plan to keep this information private or unsearchable, use the No Index toggle so that your page cannot be found through search engines. 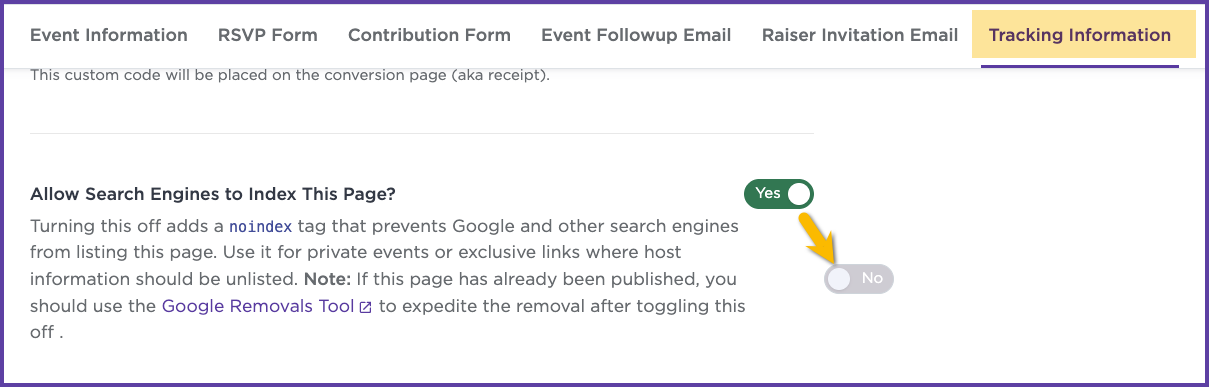
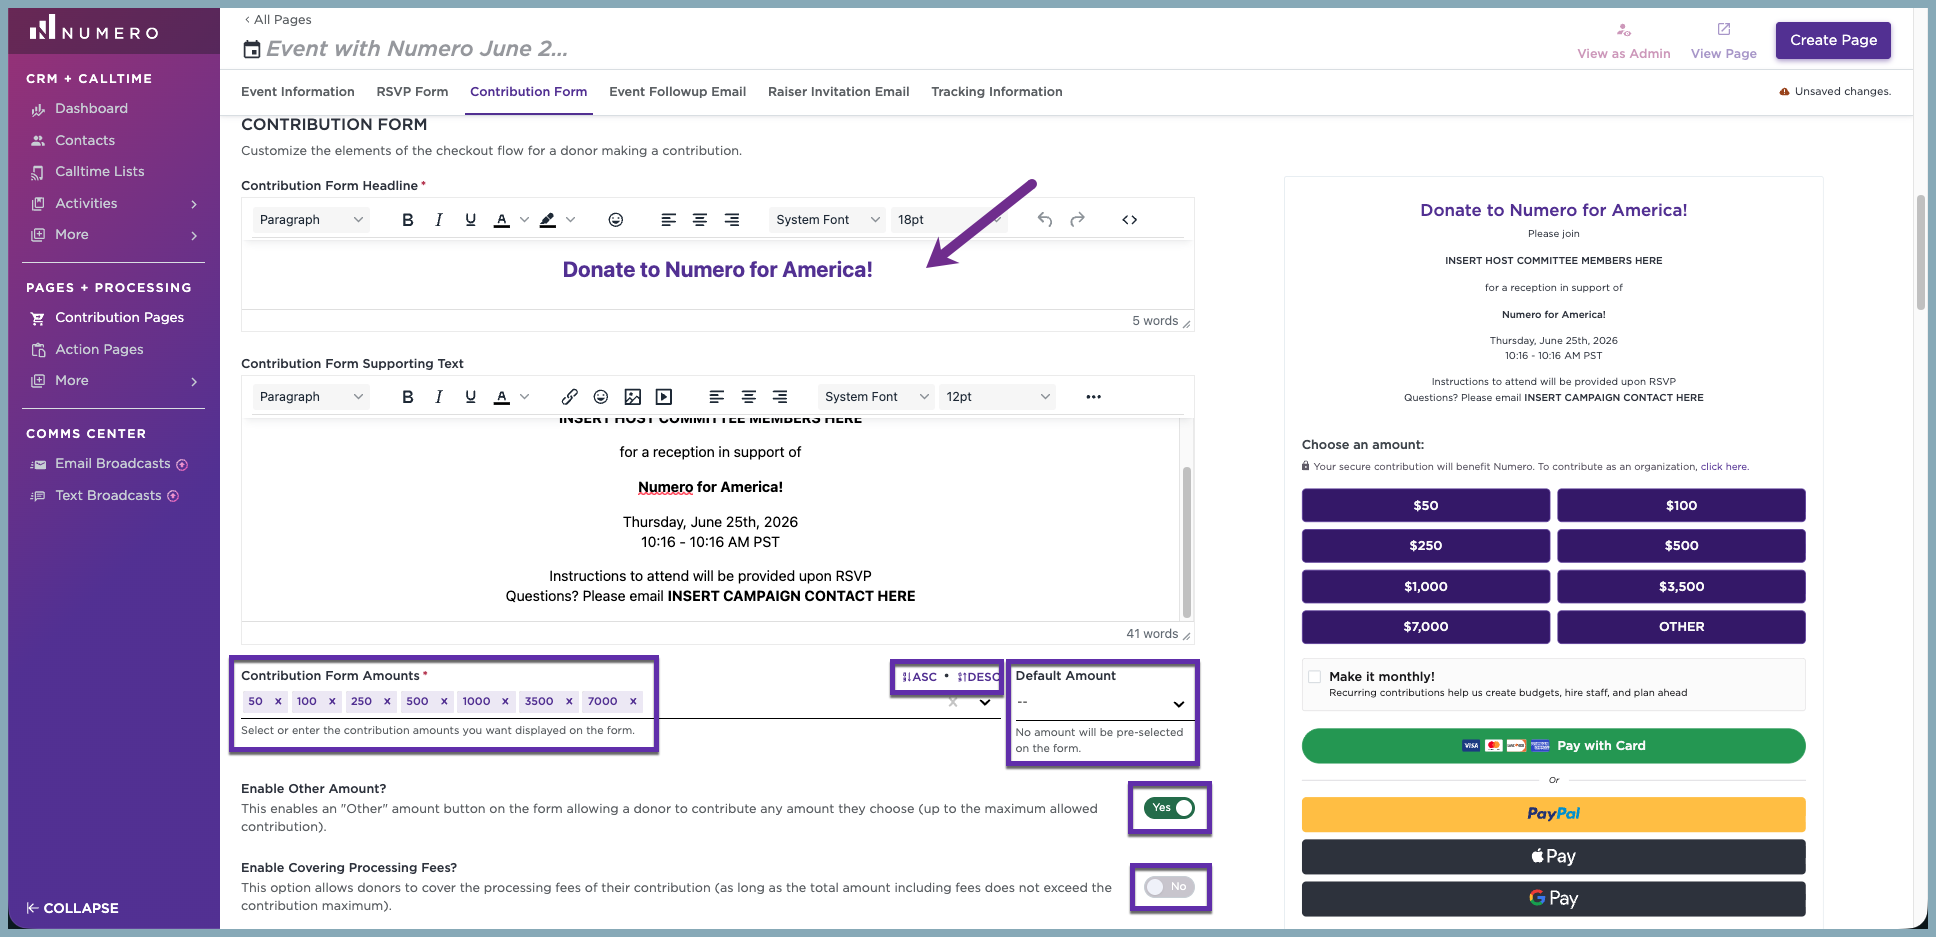
5. Next edit your contribution form. Keep in mind that your Start/End Times are pulling through what you had selected at the top of your form but you can edit them if needed. You can place in your contribution amounts and sort them by ascending or descending order. You can also select the default amount, enable other amount and custom disclaimers, and enable overing processing fees.
6. Next, input any thank you information you would like to display when donors contribute and in their receipt email. Select a team member to receive emails from donors when they reply to their receipt. You can also enable a custom redirect and recurring pop-up.
7. Fill out your event follow up email (optional) to be sent to your attendees after the event is over. Post-event go back into this editor and you'll see a green button to send the follow-up out.To complete set up be sure to select the Save Form button in the top right corner.
8. Lastly, to prevent Google and other search engines from listing your RSVP pages, toggle the option at the bottom of the editor to No. If a page has already been previously published before toggling to No, you should use
Google Removals Tool to expedite the removal. Use this for private and exclusive links.


